Loch Ness Monster
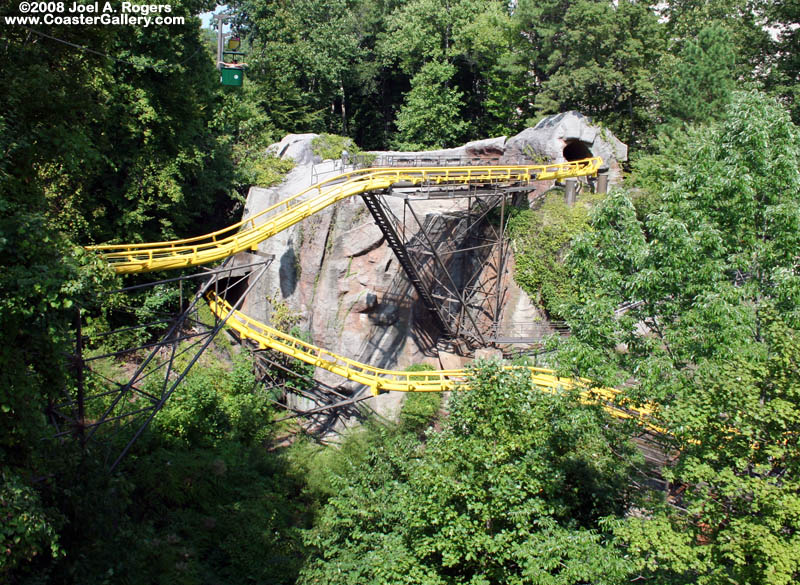
After passing through the first loop, trains encounter this block brake, the flat section situated above the metal girders and staircase. The ride originally had four trains, so there were multiple places where a train could be brought to a halt in order to ensure adequate spacing with other trains. With two lift hills, this block brake, brakes before the station, and a place for a train in the station, the ride had a theoretical capability of running four trains at once. However, timing four trains on the course was found to be a challenge, so the ride has operated with only three trains for nearly its entire existence.
Immediately following the block brake, trains descend and make nearly three complete turns in this tunnel. The base of the second lift hill is located just off the right side of this picture, and trains climb the hill just after exiting the long tunnel. At various times in its history, this tunnel had mist, lights, and a drawing of a Loch Ness Monster creature painted on the walls of this man-made cave. The tunnel's effects were nonexistent for much of the 2000s, but the lights and painting were restored for the ride's 40th anniversary in 2018.

©2018 by Joel A. Rogers.